What's needed:
* pictures of shoe from different angles, better if you have the actual shoe
* footprint template
* 9x13 and 4x4 two inch cakes
* buttercream
* fondant - white, black, light and dark gray, red
* paper towel
* serrated knife (for carving the cake)
* X-acto knife (for cutting fondant)
* cutter/embosser (for stitching details)
* modeling sticks (for holes on sides of shoes)
* ball tool (for pushing "holes" for the shoe lace)
* brush (for water to apply fondant on fondant)
* rolling pin
* roll and cut mat
1. Carve the cake. I took my 9x13 cake and carved 2 footprints from it (bottom two layers of the pic) and stacked them. The 3rd layer was cut from the 4x4 cake and the top layer is the piece cut from the 2nd layer.
2. Crumb coat.
3. Cover with white fondant.
4. Cover top of the back of the shoe with the color of the inside of the shoe.
5. Cut fondant in the shape of the tongue of the shoe and prop it up with a rolled paper towel.
6. Add more details (gray outlines in this pic).
7. Add stitching details using the cutter/embosser. Shoe lace was made by cutting thin strips of white fondant. Start with the horizontal first strip close to the front of the shoe. To do this, use the ball tool to indent a "hole" for the ends of the strip will go and put the ends of the strip in that hole. Next, put two short strips crossed over inside the gray outline. Indent holes where the crossed over laces ended and put the next cross of shoe laces. Keep adding more until you end to where you want the lace to end.
8. Roll out a rope of fondant in the same color as the inside of the shoe and put it on top of the back of shoe extending to the top of the shoe lace.
9. Add more details. In this pic, gray strips of fondant were placed on the back of the shoe for a puffy look. A loop of black fondant was also added to the top of the back of shoe.
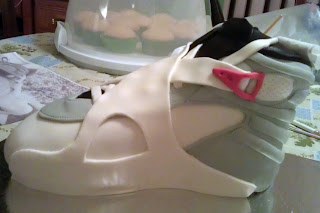
10. Add more details. Added white crossover detail and red buckles.
11. Side view of previous step.
12. Add more details. Added stitchign detail, logo and #23.
13. Add more details. Added the sole of the shoe using red and dark gray as well as a black strip on the back of the shoe.
14. View of the other side of the shoe after completing the previous step.
15. Finished cake!


No comments:
Post a Comment