Showing posts with label carved. Show all posts

Saturday, August 24, 2013

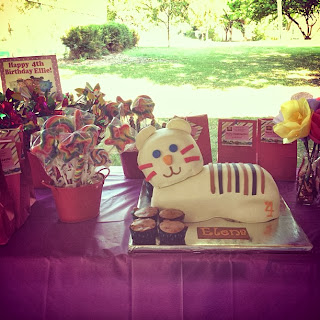
Daniel Tiger Cake


body carved from a two inch 9x13 chocolate cake
head made from two layers of 6 inch round chocolate cake
iced with chocolate buttercream
covered and decorated with fondant

Happy 4th Birthday Ellie!

Saturday, January 5, 2013

Tooth Cake!


carved from 9x13 cake
iced with chocolate buttercream
covered and decorated with fondant
dental tools made from fondant

Congratulations Duc!

Thursday, September 20, 2012

Film Reel


#3 carved from 2 layers of 9x13 chocolate cake
9 inch round reel case
6 inch round film reel
iced and filled with buttercream
covered and decorated with fondant

Happy 30th Birthday Bong!

Wednesday, July 4, 2012

Iron Throne


carved from a two-inch 9x13 inch chocolate cake
iced and filled with chocolate buttercream
covered and decorated with fondant

Happy 30th Birthday my dear Gary!

Friday, April 20, 2012

Hello Kitty cake and cupcakes


Hello Kitty cake with bangs per request
Carved from a 9x13 chocolate cake
Iced with buttercream, covered and decorated with fondant


chocolate cupcakes with fondant Hello Kitty toppers

Happy 7th Birthday, Bekah!

Thursday, February 2, 2012

Super Monkey Ball - AiAi


 head, body and feet made from two 9-inch round cakes 
ears made from rice krispy treats 
covered and decorated with fondant 
arms and hands made with fondant

Happy 4th Birthday Evan!

Tuesday, January 24, 2012

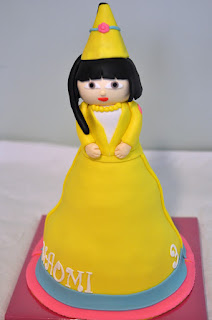
Dora Fairytale Princess


torso carved from 2 layers of 6 inch round cakes
gown (below torso) made from 2 layers of 6 inch cakes on top of 2 layers of 9 inch cakes
head made from mini ball pan
covered and decorated with fondant

Happy 3rd Birthday Miss Mimi!

Saturday, January 14, 2012

Grand Piano


This tutorial helped a lot in putting this cake together.  This cake gave me an idea of how to raise up the piano without the use of the pegs from the tutorial.

 piano and seat carved from 2 layers of 9x13 cake
covered and decorated in fondant
piano lid made from cardboard covered with fondant

Happy Birthday Angelica!

Sunday, December 18, 2011

Green Purse


carved from a 9x13 chocolate cake
iced with buttercream
covered and decorated with fondant

Happy Birthday Mom!

Wednesday, December 14, 2011

3D Hello Kitty


made almost entirely of cake, fondant and icing
(with the exception of the whiskers - toothpicks covered in fondant)
body is made from 2 two-inch layers of 6 inch rounds
head is made from the ball pan

Happy Birthday Tita Nessli!

Tuesday, November 29, 2011

How to make a Shoe Cake

When I made the shoe cake, I wasn't intending on making a tutorial.  I was just taking progress photos to help me in case I need to make another shoe cake.  These are camera phone pictures so they're not the best quality but I hope they are still helpful.  Enjoy!

What's needed:
  * pictures of shoe from different angles, better if you have the actual shoe
  * footprint template
  * 9x13 and 4x4 two inch cakes
  * buttercream
  * fondant - white, black, light and dark gray, red
  * paper towel
  * serrated knife (for carving the cake)
  * X-acto knife (for cutting fondant)
  * cutter/embosser (for stitching details)
  * modeling sticks (for holes on sides of shoes)
  * ball tool (for pushing "holes" for the shoe lace)
  * brush (for water to apply fondant on fondant)
  * rolling pin
  * roll and cut mat

1.  Carve the cake.  I took my 9x13 cake and carved 2 footprints from it (bottom two layers of the pic) and stacked them.  The 3rd layer was cut from the 4x4 cake and the top layer is the piece cut from the 2nd layer.

2.  Crumb coat.

3. Cover with white fondant.

4.  Cover top of the back of the shoe with the color of the inside of the shoe.

5.  Cut fondant in the shape of the tongue of the shoe and prop it up with a rolled paper towel.

6.  Add more details (gray outlines in this pic).

7.  Add stitching details using the cutter/embosser.  Shoe lace was made by cutting thin strips of white fondant.  Start with the horizontal first strip close to the front of the shoe.  To do this, use the ball tool to indent a "hole" for the ends of the strip will go and put the ends of the strip in that hole.  Next, put two short strips crossed over inside the gray outline.  Indent holes where the crossed over laces ended and put the next cross of shoe laces.  Keep adding more until you end to where you want the lace to end.

8.  Roll out a rope of fondant in the same color as the inside of the shoe and put it on top of the back of shoe extending to the top of the shoe lace.

9.  Add more details.  In this pic, gray strips of fondant were placed on the back of the shoe for a puffy look.  A loop of black fondant was also added to the top of the back of shoe.

10.  Add more details.  Added white crossover detail and red buckles.

11.  Side view of previous step.

12.  Add more details.  Added stitchign detail, logo and #23.

13.  Add more details.  Added the sole of the shoe using red and dark gray as well as a black strip on the back of the shoe.

14.  View of the other side of the shoe after completing the previous step.

15. Finished cake!
Monday, November 28, 2011

Jordans!


 carved from 9x13 and 4x4 cakes
covered and decorated with fondant

Happy Birthday Benmark!

Wednesday, November 9, 2011

Thomas the Tank Engine


carved from a two inch 11x15 cake 
covered and decorated with fondant

Happy 4th Birthday Asher!

Tuesday, October 25, 2011

Hello Kitty


carved chocolate cake
made from 2 layers of 9x13 inch chocolate cakes
iced and filled with chocolate buttercream
covered and decorated with fondant

Happy Birthday Abby!

Tuesday, September 27, 2011

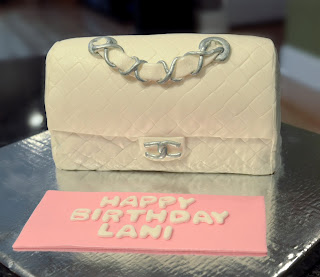
Chanel Classic Flap Bag


I'm sure glad that I can now make custom cakes.  It made it easier to give a gift to a friend who already has it all :)

The birthday celebrant is very much stylish and as far as I know loves Chanel.  I've seen her with a black Chanel bag so I thought I'd make her a small white one.  As it turns out, she already has the white one as well!  Good thing this one's a cake and will be eaten anyway :)

The cake was made from a 9x13 cake cut into 4 and stacked then filled and iced with buttercream.  The cake was covered with fondant.  All the decorations are made from fondant as well.

Happy Birthday Tita Lani!

Thursday, September 15, 2011

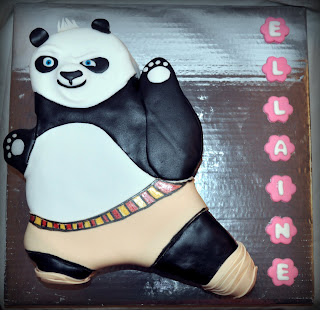
Kung Fu Panda


Carved Chocolate Cake
made from 2 layers of 9x13 inch chocolate cakes
iced and filled with chocolate buttercream
covered and decorated with fondant

Happy Birthday Ellaine!

Wednesday, July 6, 2011

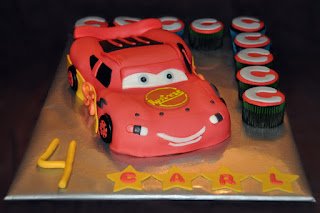
Lightning McQueen


A Lightning McQueen cake for the Cars lover.

I'm getting more and more confident in making carved cakes and I'm quite happy with how my Lightning McQueen turned out.  The cake was carved from a 9x13 and a 9-inch square cake on top, filled and iced with chocolate buttercream.  All details and decorations are made from fondant.

Happy 4th Birthday Carl!

Thursday, June 23, 2011

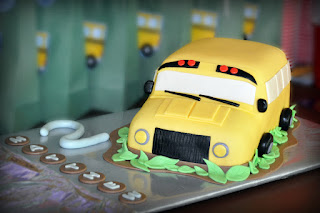
Wheels on the Bus!


My dear baby boy is now 2!  Before turning 2, he fell in love with the Wheels on the Bus song.  He even knows all the actions to the song and I'm sure that if he can talk already, he'd know the words to it as well.  So for his birthday party, I decided to go with that theme and made him a bus cake.

The cake was made from 3 layers of 2-inch 9x13 chocolate cake.  It was filled and iced with chocolate buttercream.  It was covered and decorated with fondant.


Happy 2nd Birthday dear Matthew!

Thursday, March 10, 2011

Speed Skate


The speed skate was made from a 9x13 chocolate cake, cut, stacked and carved.  All the decorations are made from fondant.  The block is also made of chocolate cake, covered and decorated with fondant.  The base cake is a two layer 9x13 chocolate cake.

Although I have made a shoe cake before, this one presented an extra challenge.  I was determined to have the skate stand on its blade.  At first, it seemed impossible.  Then after searching online on forums and blogs, one suggestion that stuck out was to use dowels.  One thing with that suggestion, I didn't think it would completely support the shoe.  I was afraid that the shoe will tilt to the side and fall over.  While chatting with a friend, we came up with a solution.  A block to put under the shoe to support its side! Genius! It totally worked.

I hope the birthday boy enjoyed this cake as much as I enjoyed making it :)

Happy Birthday William!

Monday, February 28, 2011

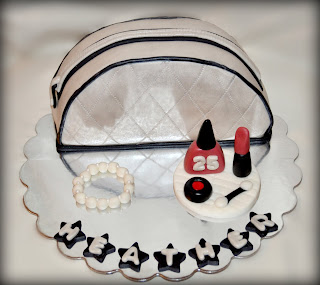
Pretty Ladies!


A make-up kit cake for the beautiful ladies!  This cake was requested by a friend for her sister's 25th birthday.  Her sister was a hair and make-up artist, making this make-up kit cake perfect for her.  It was a chocolate cake with chocolate icing covered with fondant.  All the decorations, make-up, bracelet and name were made from fondant.  This design is based on this cake.

The cake was made using two 9-inch round cakes.  A little portion of the cake was cut off for the bottom of the purse.  For every cake that I make, I seem to always learn a lesson.  For this one, I think using two square cakes, cutting them in half, stacking them and then carving the sides to form the shape would have held up better.  Using the round cake made the cake tilt a bit.  Not too obvious in the picture since it was tilting backwards.  Thankfully, they still loved the cake!  I've been told that I am too harsh on myself when it comes to the cakes I make.  I say there's always room for improvement!

Happy Birthday Heather!